
The Skillful Warrior
Does not rely on the enemy's
Not coming,
But on his own
Preparedness.
He does not rely on the enemy's
Not attacking,
But on his own
Impregnability.
Sun-tzu, 'The Nine Changes' The Art of War
In 'Do Nothing' we looked at the necessity for doing nothing when appropriate. Now we'll go beyond the necessary and explore the boundaries of the possible. It's possible to play almost an entire game in a passive manner. We've all used mainline openings and the solid positions they produce to get draws at one time or another. However, the same method can also be employed to win games. When facing a higher rated player, the lower rated player can put all the pressure to win on their higher rated opponent by simply doing nothing from very early on, and by continuing to do nothing until there might arise an opportunity to do something (of course, there might not). What follows is as much risky psychological warfare as it is chess, and thus cannot be wholeheartedly advocated for, only explained!
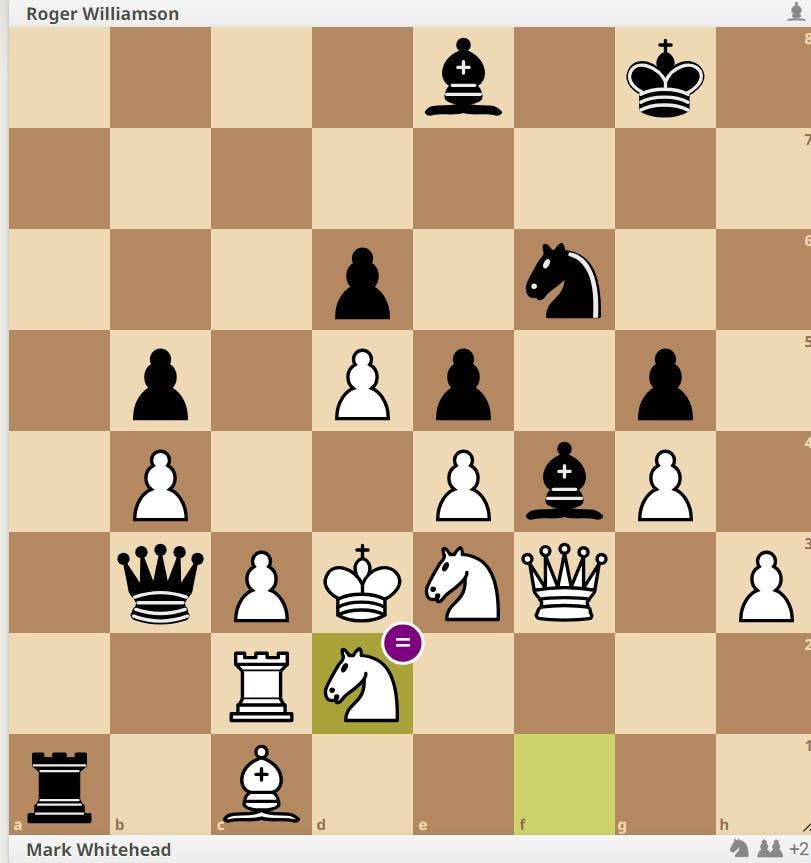
Mark Whitehead (approx. 2000) - Roger Williamson (approx. 2200) Leyland Open, 2015
The excellent Devious Chess by Amatzia Avni features a chapter on provocation but does not consider the methodology we're about to examine. Games like Rashid Nezhmetdinov vs Maximilian Ujtelky (1964) are certainly masterpieces of provocation, but it's more reckless provocation than the poisoned invitations to attack we're going to look at.
My opponent in the following game fragment, the late Mark Whitehead, was a master of doing nothing. So much so that I used to dread playing him - which in itself demonstrates the potential efficacy of the method.
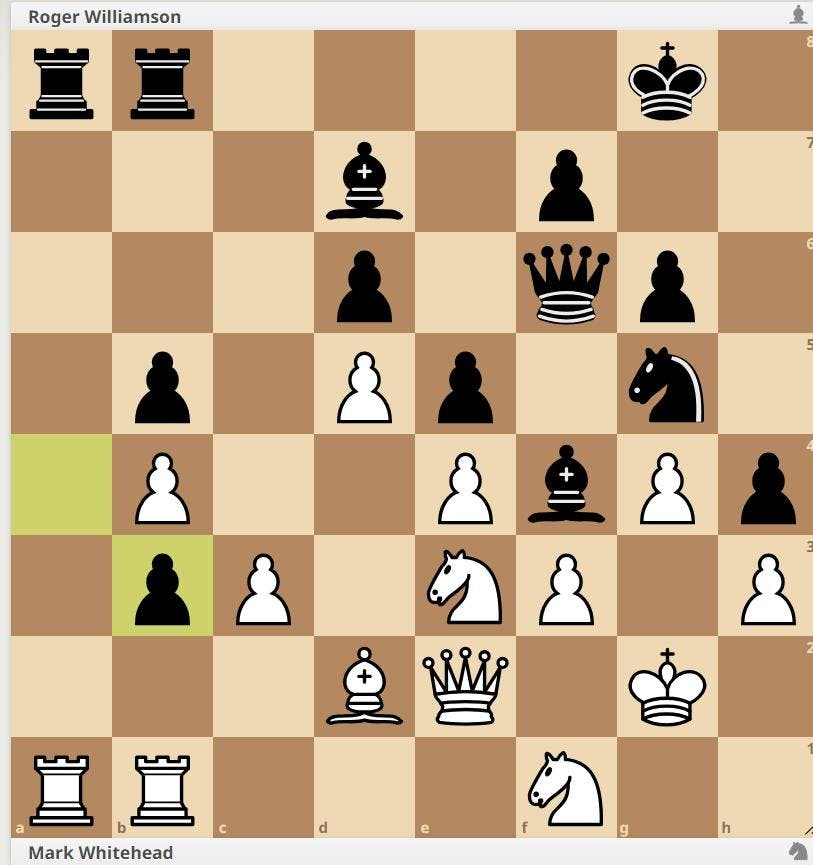
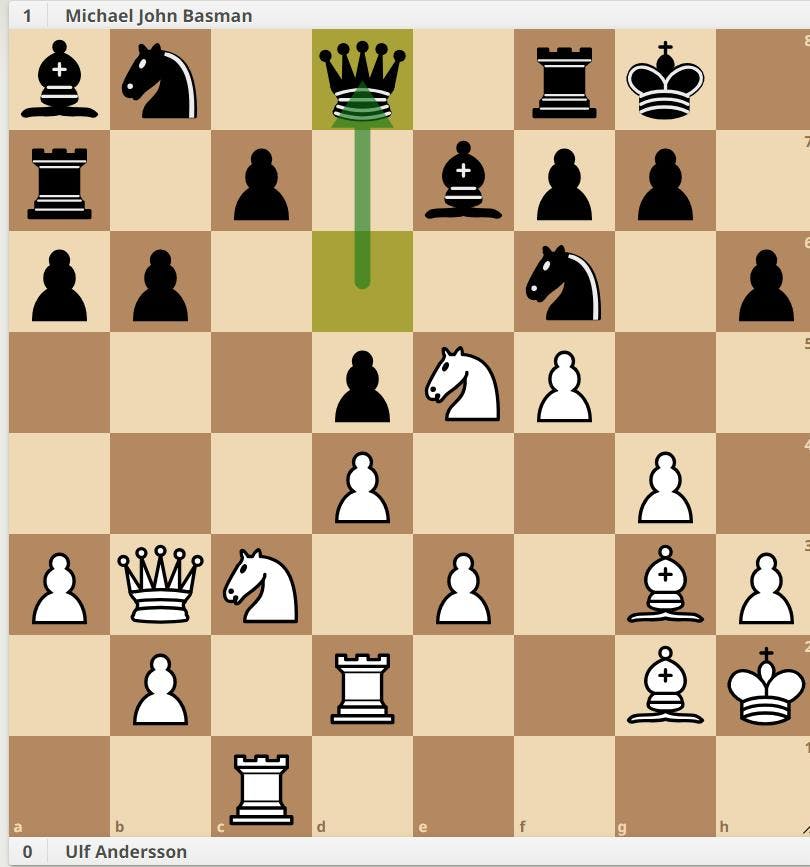
After 33... ab. White to play.
This complex middlegame position has come from a mainline Chigorin Ruy Lopez in which white, relying on the fundamental solidity of his position, has let black do what he likes. Consequently, black has offered a pawn sacrifice in order to infiltrate black's position down the a-file. Black is slightly better, but only because he is dictating terms.
31. Be1!
As we'll see in this game and the following two games, the bishop, like the rook and the king, is a great 'do nothing' piece. It has a metronomic quality when used (or is that not used?) to good effect.
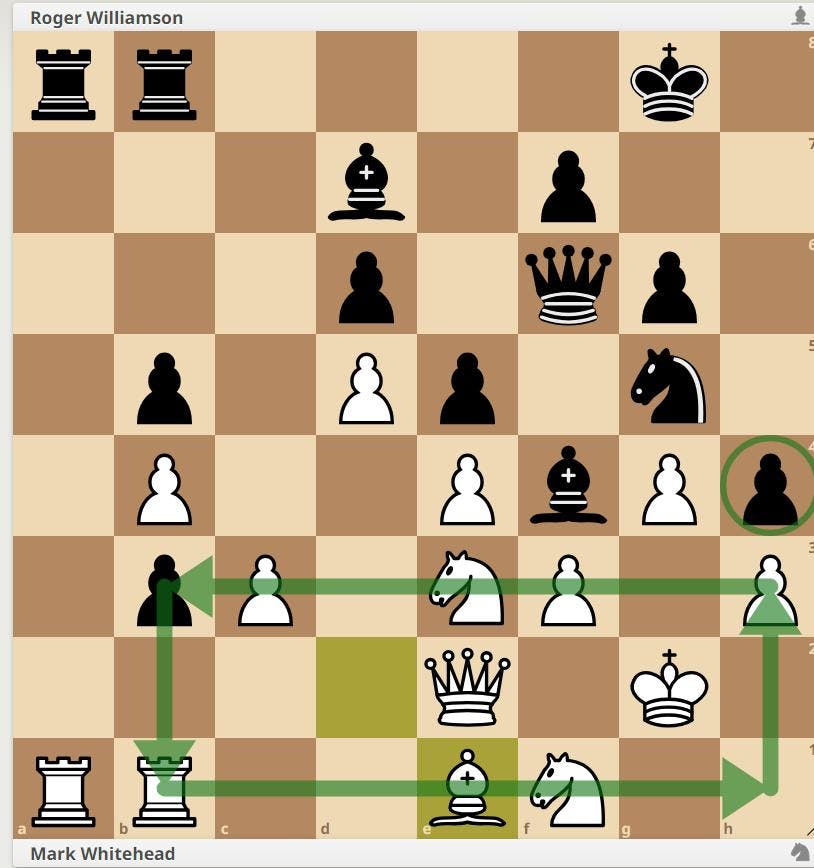
White restricts himself to what he can hold, and what he can threaten.
Which white ignores. The infiltration along the a-file can't be stopped, so he restricts himself to the territory he can hold (marked above) and threatening the advanced black h-pawn - the only thing he can threaten.
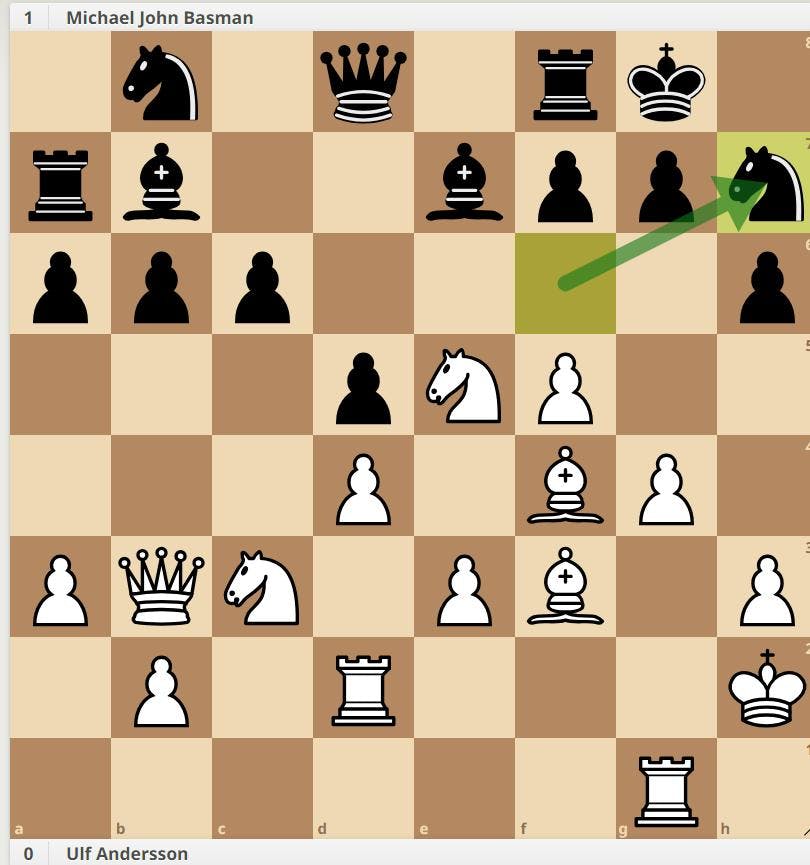
34... Nh7 35. RxRa8 RxR 36. Rxb3 Qg5 37. Rb2 f5 38. Bd2!
Do nothing. Not flinching in the face of ...f5.
38... fe 39. fe Nf6 40. Qf3 Ra3 41. Rc2!
Do nothing. Put the pressure on black, the higher rated player, to find the breakthrough. By this point I was approaching my last five minutes, whereas Mark had at least twenty left on his clock. It should not be underestimated how mentally draining and time consuming it can be to try to find the best attacking moves against an opponent who casually, quickly, move-by-move, merely firms up their position.
41... Ra1 42. Kf2 Nh7
(Testament to how sound white's position is that 42... Bxe3+ goes nowhere. 43. Bxe3 Nxe4+ 44. Kg2 Qf6 45. Nd2 Qxf3+ 46. Kxf3 Nf6 47. c4 bc 48. Nxc4 Nxd5 49. Nxd6 is approximately equal!)
43. Ke2 Qd8
Black gives up trying to break the kingside from one direction, and switches to attacking it from the queenside.
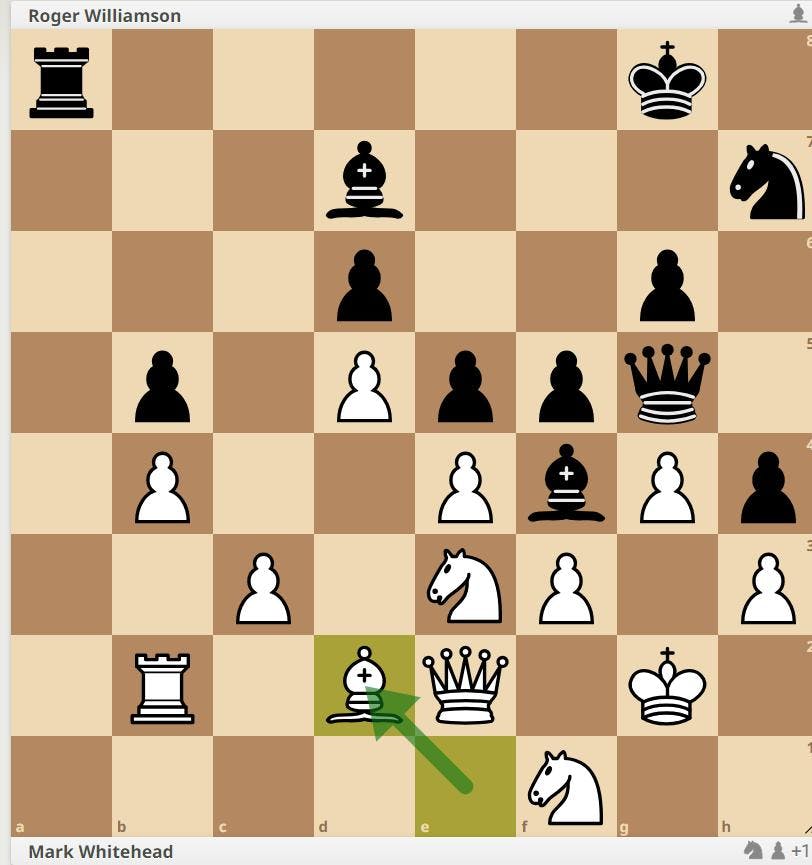
44. Be1
And white moves his bishop to attack h4 again!
44... Qa8
Black sacrifices another pawn. The position is equal, but black is now out of pawn breaks, and has to rely on a breakthrough with pieces to justify his two pawn deficit. Whereas thanks to his material and time advantage, white has realistic winning chances. Black is very close to overstepping the mark and going too far in pursuit of victory. And yet, having invested one pawn, down on the clock, what other choice did I have?
45. Bxh4 g5 46. Be1 Qa4 47. Bd2 Nf6 48. Kd3?
Even white finally loses patience with his own strategy. 48. Rc1 would do nothing rather effectively.
48... Qb3?
Time drawing short, starting to panic, I miss my chance. 48... Be8! Would have revitalised black's attack.
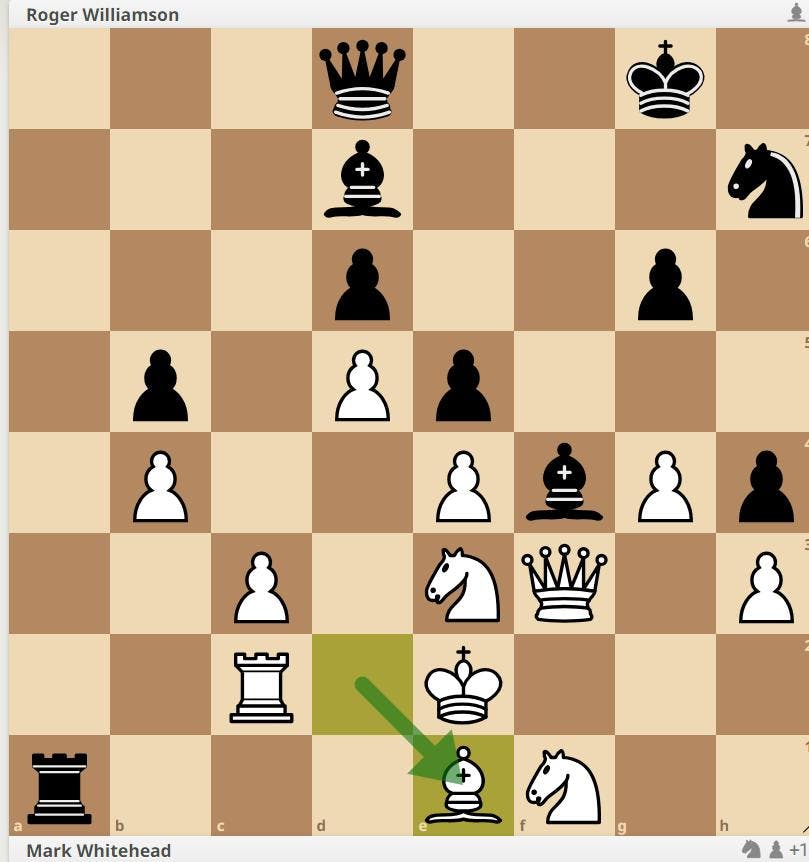
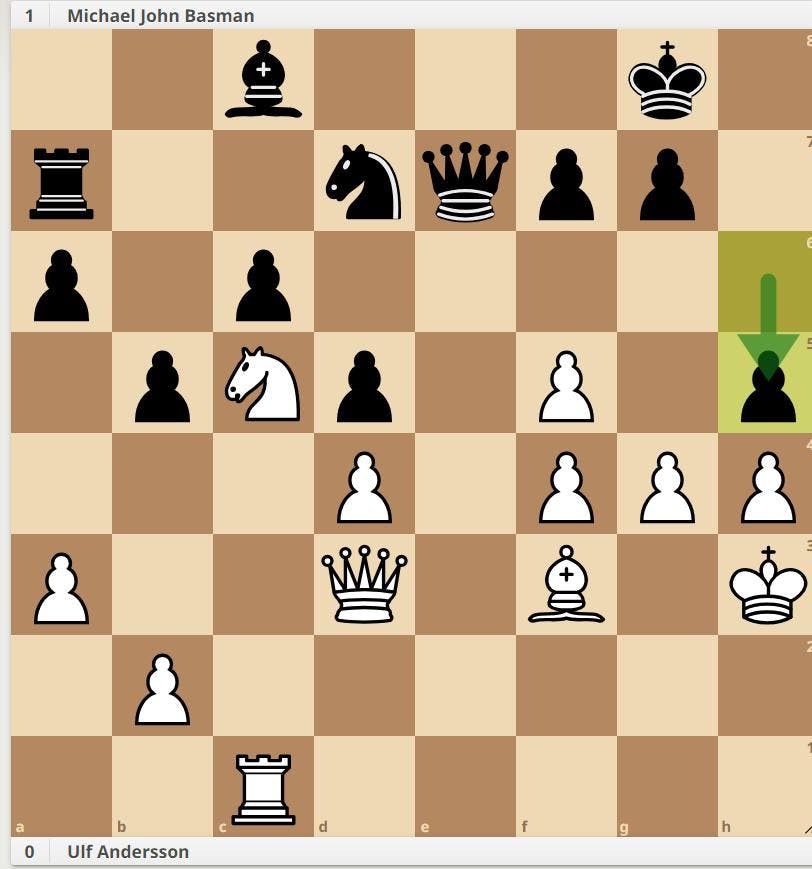
49. Bc1! Be8 50. Nd2 =
Black owns nearly three quarters of the board and yet still there is no way through.
The game continued for more than twenty moves. With a minute to go I finally lost patience, further sacrificed an exchange, and only escaped with a draw thanks to my opponent's own impending time crisis and the reciprocal pressure to calculate my desperate play (finally) put him under. I really should have lost.
Ulf Andersson - Michael John Basman Hastings, 1975
What's dangerous at an amateur level can, in this instance, be no less dangerous in Grandmaster play. Here's the late Michael Basman luring that usually most patient of world class players Ulf Andersson into making a series of mistakes. How does Basman do it? By moving his bishop back and forth, back and forth between a8 and b7, and his king to and from h7, g8, h8, g8.
An actual objective evaluation of black's middlegame play in this game would conclude he was in trouble. That's to miss the point. That the engine finds in white's favour to the tune of at least +1 doesn't change the fact that that 'do nothing' resulted in an illustrious player's unravelling in the face of severe provocation.
(Note: some of the annotative symbols you're about to witness are not necessarily used to denote the objective value of the moves played, but rather reflect Basman's chutzpah in playing them.)
1. Nf3 b6 2. g3 Bb7 3. Bg2 e6 4. O-O d5 5. c4 Nf6 6. d4 Be7 7. Nc3 O-O 8. Ne5
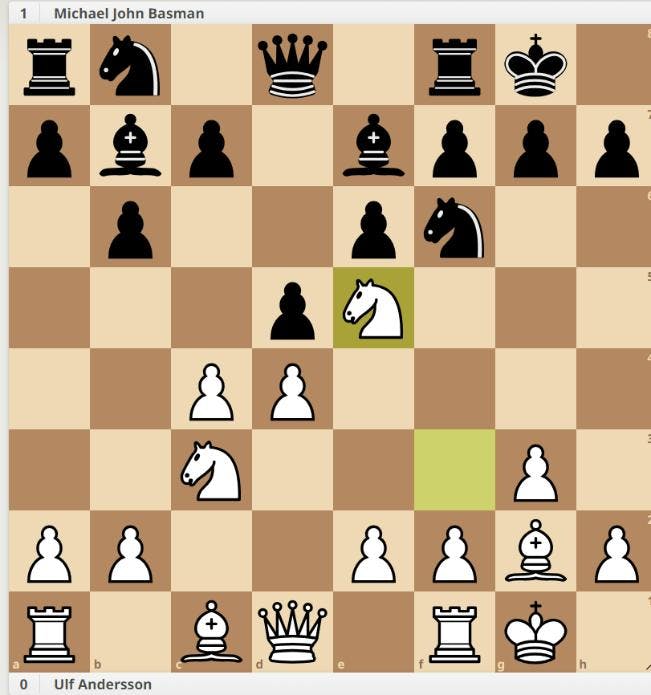
So far so typical. A standard Queen's Indian. But black is now going to play a series of slightly mystifying moves, the purpose of which will be revealed. 8... Nbd7 would be normal.
h6 9. Bf4 a6
What's this?
10. Rc1 Ra7!
So that's what a6 was for.
11. cxd5 exd5 12. Qb3 Ba8! 13. Rfd1 Kh7
And that's what h6 was for. Black is going to shuffle the king and the bishop between two squares apiece until white does something.
14. h3 Kg8! 15. Kh2 Kh7! 16. g4 Kg8! 17. Bg3 Bb7! 18. e3 Ba8! 19. a3 Bb7! 20. f4 Ba8! 21. Rd2 Qd6
Suddenly it looks as if black feels he must do something now white is advancing on the kingside.
22. f5 Qd8!
Nope!
23. Bf4 Bb7! 24. Rg1 c6 25. Bf3 Nh7
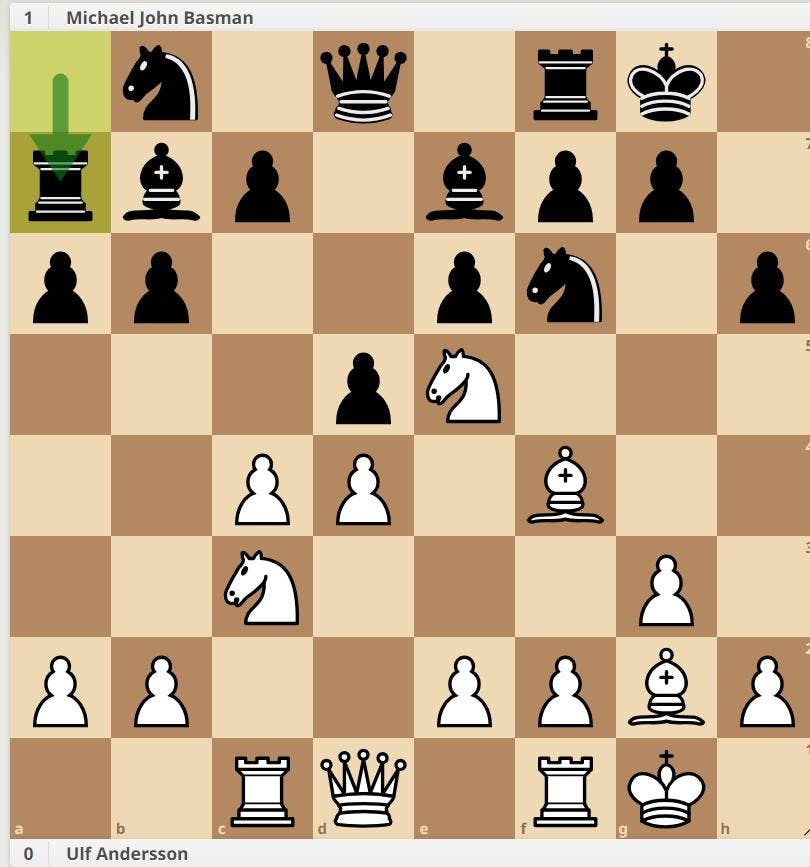
Now with an attack coming down the g-file, black has to at least do something reactive.
26. Rc1 Bd6 27. Na4 Bc7 28. Kg3
White creeps forward. Black isn't doing anything, so why not? Well, they're not visible yet, but this strategy comes with its own risks.
Nf6 29. h4 Nfd7 30. Nxd7?
Such has been the disorientating quality of Basman's apparently planless play, Andersson makes an uncharacteristic mistake. The position is now more or less equal.

We've all heard that in such situations where we have a space advantage we should resist trading pieces. Well, a GM knows that this is merely a guideline. Exchanges are good when they lead to an advantage. Except here they don't. As the bishop on f4 is annoyingly pinned to the king.
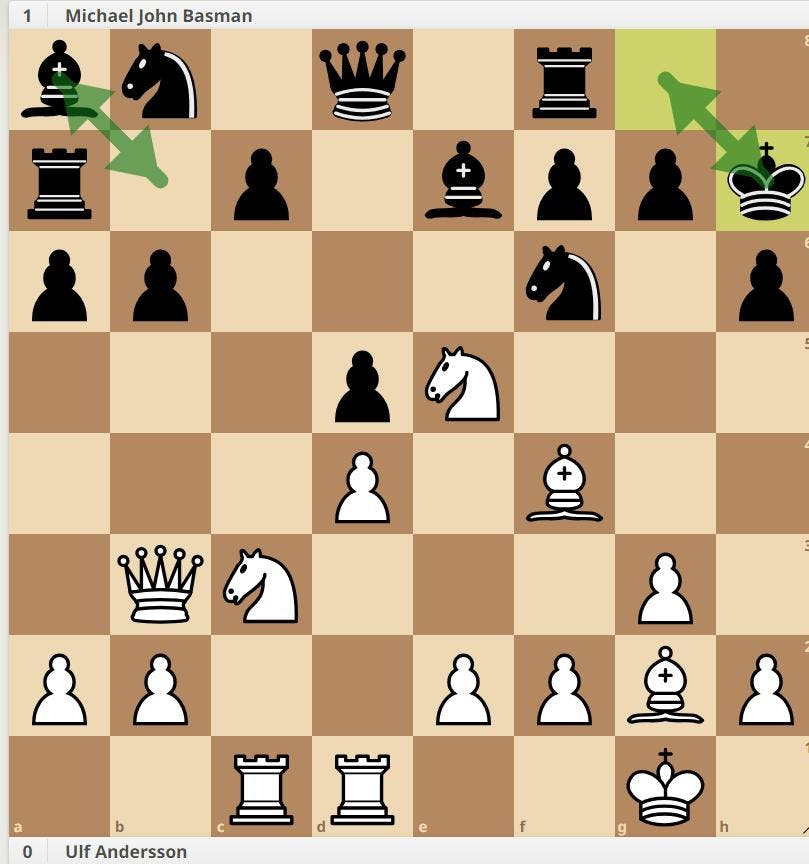
Nxd7 31. Re2 Re8 32. Kh3?
Such is the pressure of having to find a way through in the face of an opponent that seemingly refuses to compete, white missteps. Having been in a position where he could do just about anything, Andersson, I suspect, found it hard to refocus in an equal position where his choices have narrowed. 32. Nc3 would have kept the balance.
Bxf4 33. exf4 Rxe2 34. Bxe2 Qe7 35. Bf3 b5 36. Nc5 Bc8?
A provocation too far.
37. Qd3??
Or not! The third mistake is the killer. 37. Nd3 would have given white the edge again.
37... h5!
Now black has the edge.
38. gxh5??
Perhaps thoroughly confused, white capitulates. And who can blame him? 38. Nxd7 was called for this time, but when you've been trying to crack a nut as long as white has been it's very difficult to pivot and accept that the nut is now trying to crack you. Especially when you factor in a time control presumably rapidly approaching at move 40.
Black's strategy, to bring a world class player down to his own standard by doing nothing, has succeeded. The reciprocal mistakes that followed from this point on can be taken as further evidence of that success (or can be considered merely reciprocal mistakes - up to you).
38... Qf6 39. Kg3 Nxc5 40. Rxc5 Bxf5 41. Qc3 Bd7 42. Qd3 Ra8 43. Rc1 Re8 44. Qc3 c5 45. Qxc5 Qf5 46. Qxd5 Qh3+ 47. Kf2 Qh2+ 48. Bg2 Qxf4+ 49. Bf3 Bg4 50. Rc3 Qh2+ 51. Bg2 Qxh4+ 52. Kg1 Re1+ 53. Bf1 Bh3 0-1
Gregory Serper - Hikaru Nakamura San Diego, US Championship 2004
Our final game, though a draw, is the ultimate 'do nothing' achievement. This is the idea taken to its logical conclusion, or reduced to the absurd, depending on whether you are a 'glass half full' or a 'glass half empty' kind of person. I've presented it largely without comment and in pgn form as it's rather long (and, as per the theme exemplified, rather repetitive). It features all the important aspects of do nothing strategy: as in our first game, one side retreats to a quadrant of the board and displays confidence in its impregnability even as the ground he holds shrinks, and, as in our second game uses a bishop to effectively 'pass' on moves and simply mark time.
What does a veteran Grandmaster do when facing a teen prodigy in their national championship? They can either play chess, where the odds favour the prodigy, or they can hunker down and take to the trenches. Watch out for the stalemate trick at the end!