
Hey everyone,
Jamie Kumar at your service, member of the John Littlewood Chess Academy, and yes, I'm one of those unfortunate people who's been using 1. d4 for what feels like an eternity in his chess "career." But hey, we can't all be 1. e4 rebels, right?
Now, let's dive right into the heart of my first blog, where I'll be delving into the so-called Carlsbad pawn structure. My goal here? To make this blog an assortment of useful chess knowledge that caters to everyone, whether you're a fledgling beginner, or just an ambitious amateur wanting to get better at the game.
Before we dive into the intricacies of said Carlsbad pawn structure, I'd highly recommend checking out Roger's glossary of chess terms just in case you're not already well-versed in the chess lingo.
Alright, let's cut the Jamie-babble before we all fall into an eternal chess-induced coma. So, what's the deal with the Carlsbad? Why should I care? Will it really help me?
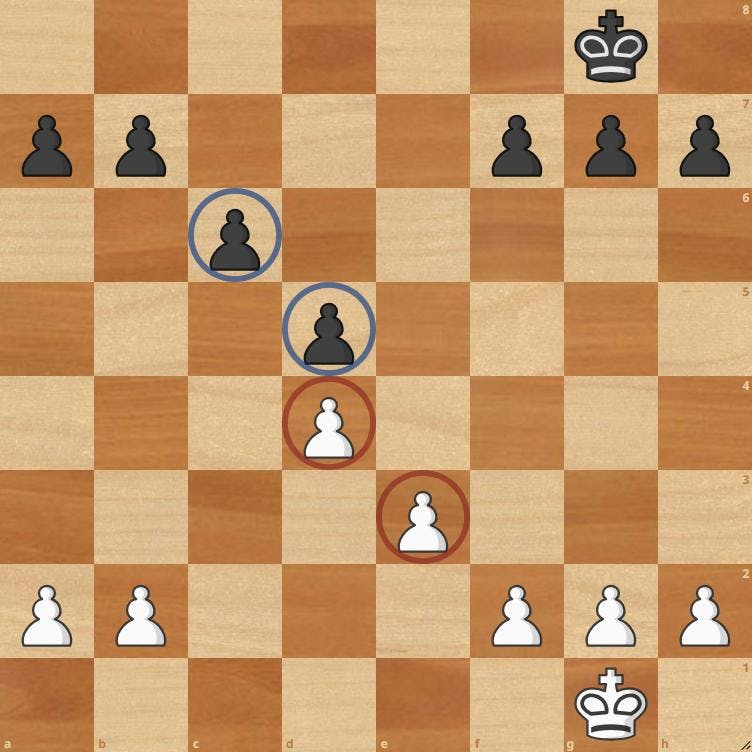
Reasonable questions, I agree... so here is the Carlsbad pawn skeleton, in its most plain and simplest form:
What would I have said to this when I first started playing chess?
"So what, pawn structures have names, it doesn't make a difference to me, I don't care, just let me play chess!"
Bit of hindsight for you, that exact rationale is why I didn't get any better at chess for a while...
So with that note, let's carry on. Where does the Carlsbad pawn structure come from? Well, any positions where one side trades a c pawn for an e pawn can bring about the above position:
Don't worry if you aren't glossed up on all the opening names just yet; we've all been there, overwhelmed just trying to navigate it all. Just remember the above diagram for now. We're more interested in the first bullet point from above here: The Queen's Gambit Declined Exchange Variation.
Okay, so we've now answered the what, and the how, but not the why?
Why does White want to play the Carlsbad?
I want to play a highly positional structure, with concrete plans and ideas, where I can CHOOSE to bypass any middlegame complexities, and try to squeeze the full point of of my opponent, in the endgame that's slightly better for me.
Why does Black want to play the Carlsbad?
I want a very solid structure, tried and tested by my predecessors, where I have very high drawing chances against my equally strong opponent with the white pieces.
While the above is certainly true at the elite level, for someone who is new to chess, I would much rather hear the following:
White: Good Endgame + Flexible.
Black: Kingside Attacks.
Now, disappointingly, because I am trying to cater to a variety of levels of chess player, that (very) concise summary of the situation is now the whole truth. But:
Ok, I know what you're thinking, I'm certainly think the same thing. Enough talking, let's get this thing rolling:
1. d4 on the board - yawn! ... d5 2. c4 from white. The Queen's Gambit - like the TV series. 2... e6 - Queen's Gambit Declined (black doesn't take white's offered pawn). 3. Nc3 Nf6 4. cd ed
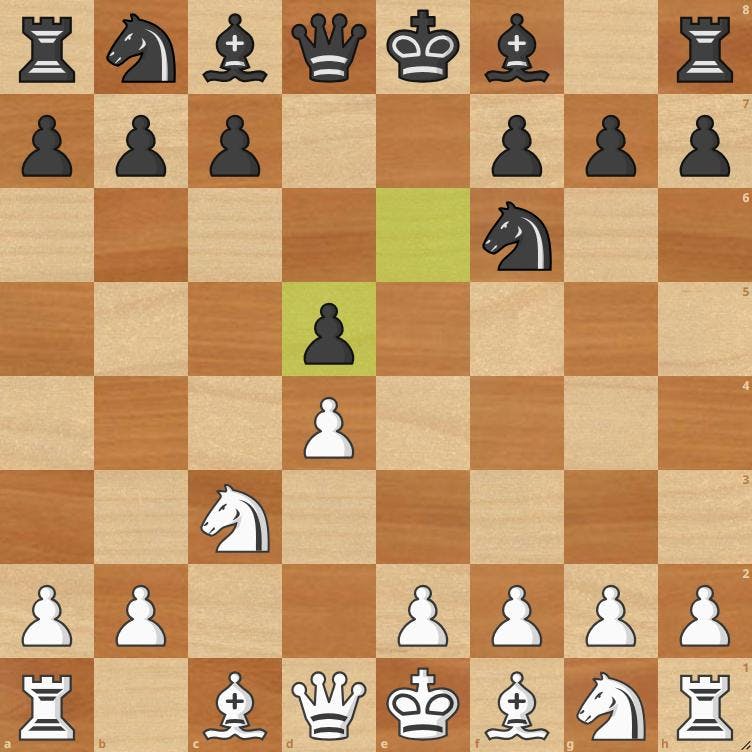
Black recaptures white's pawn with his e pawn. And we enter the Queen's Gambit Declined Exchange Variation. Sorry for all the similar names.5. Bg5 pinning the black knight to the queen. 5... c6.
And low and behold, we have our Carlsbad pawn structure with only 6 moves having been played from either side. Looks pretty similar to the diagram we showed before right at the very start, doesn't it, only with more pieces. 1. d4 d5, 2. c4 e6, 3. Nc3 Nf6, 4. cxd5, exd5, 5. Bg5 c6, 6. e3, is by far the most common way you'll see the Carlsbad arise. The move 5. Bg5 is given its grandiose title of The Positional Variation, and its noteworthy that every world champion has employed it with success at some point in their careers.
What follows is a cautionary tale for those wishing to follow in their footsteps:
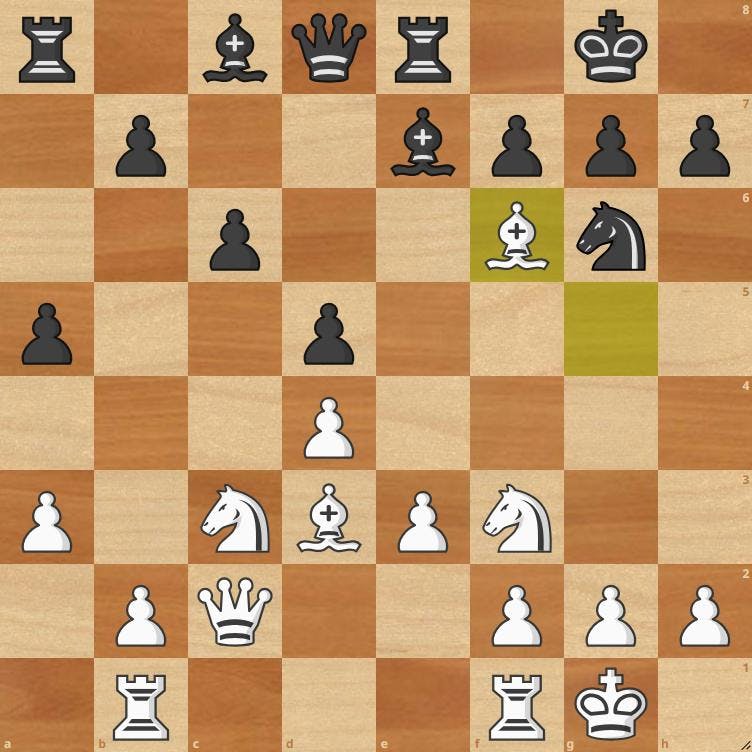
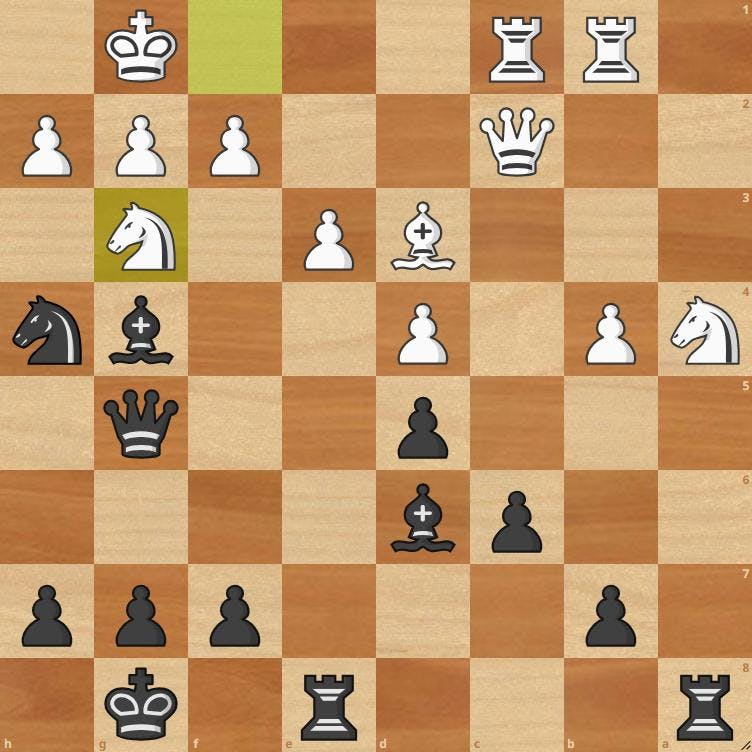
GM Jens-Uwe Maiwald vs. IM Christoph Singer (1991 - Krumbach Open)
Okay, I've turned the heat up quite fast, and there's a lot of pieces flying around. What's actually happening here?
Before I talk more about this position, I also wanted to point out that Roger makes very good points in his blog: Why Study The Opening?:
Why study the opening? Note I say the opening, not a specific line. Learn plans, not openings.
While I've already demonstrated how to waltz into the Carlsbad structure in just six moves, I'm not about to send you spiralling into the labyrinth of memorizing countless lines and variations. Instead, let's aim for something far more valuable: the ability to spot this Carlsbad structure when it emerges on the board and understand the broader strokes of plans and ideas. It's a more practical and manageable approach, trust me. So, let's steer clear of early memorization traps and focus on developing that keen chess intuition. Back to the game:
13. Bxf6!
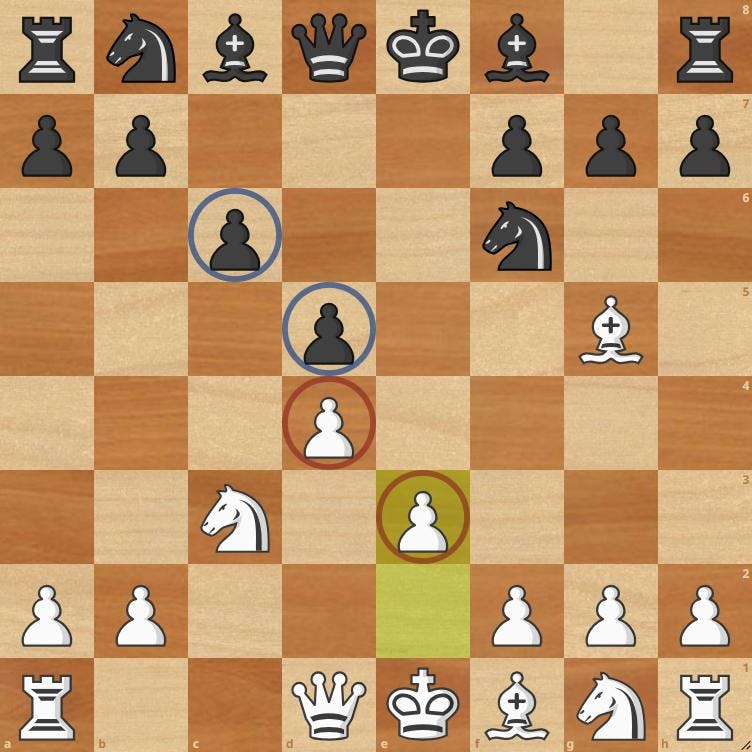
13... Bxf6. I want you to remember the following point, as this is going to be crucial in our analysis later:
White has traded off his dark squared bishop for black's knight, leaving black with an unopposed dark squared bishop.
This unopposed dark squared bishop of black's can often be a menace to White in the Carlsbad structure. This is because it can often bring Black one step closer to his kingside attack. Now, let's be clear here: the statement above is by no means a one-size-fits-all universal truth. I'm not here to proclaim that White is on the verge of collapse due to a simple Bishop-for-Knight trade-far from it. What I am suggesting, though, is that in the context of Black's master plan of constructing a menacing kingside attack, this exchange has made his life just a smidgeon easier. But here's where you might be scratching your head and thinking, "Why, did White go ahead with this trade? Surely someone of Maiwald's calibre knows better than to make such seemingly elementary mistakes, right?" Well believe it or not, this 13th move Bxf6 is still in the realm of master level theory, and the rationale is as follows:
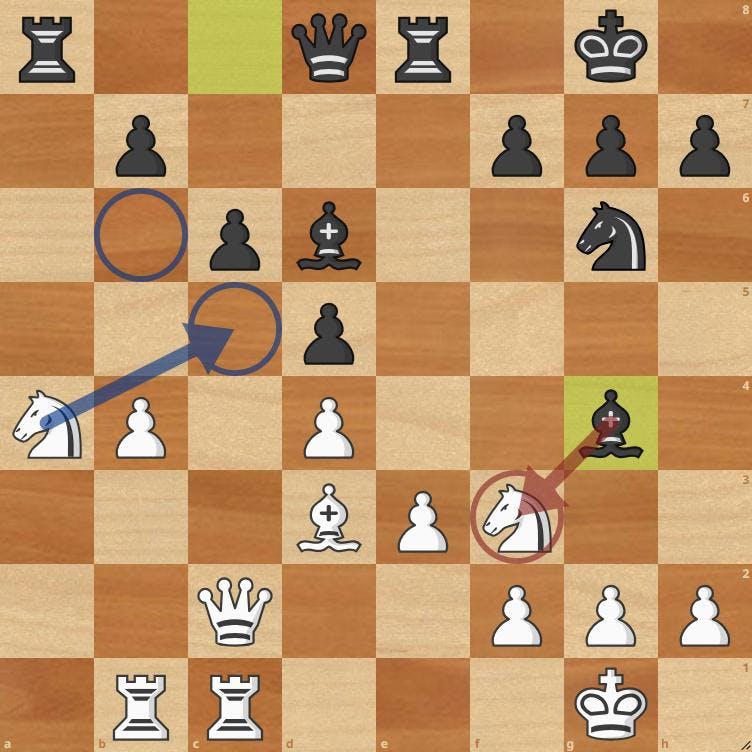
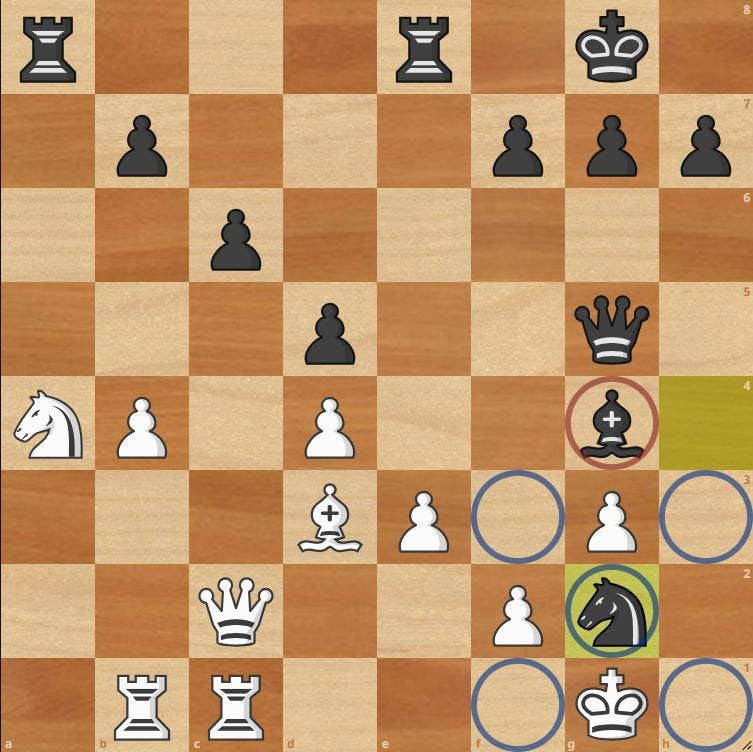
White has deflected black's dark squared bishop from the e7-b4 diagonal (highlighted in blue below). This means black doesn't protect the b4 square (highlighted in green) as well as he did before. This therefore allows white to accelerate his queenside play, with the move pawn to b4.
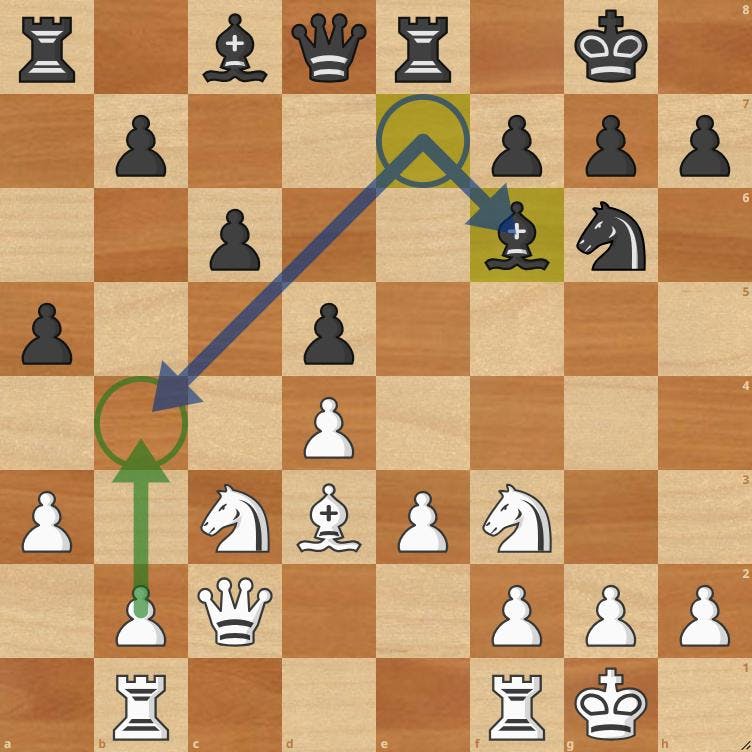
What has removed the (black) defender of the b4 square, and so gets to expand on the queenside with b4. This paves the way for White to kickstart his Carlsbad queenside attack.
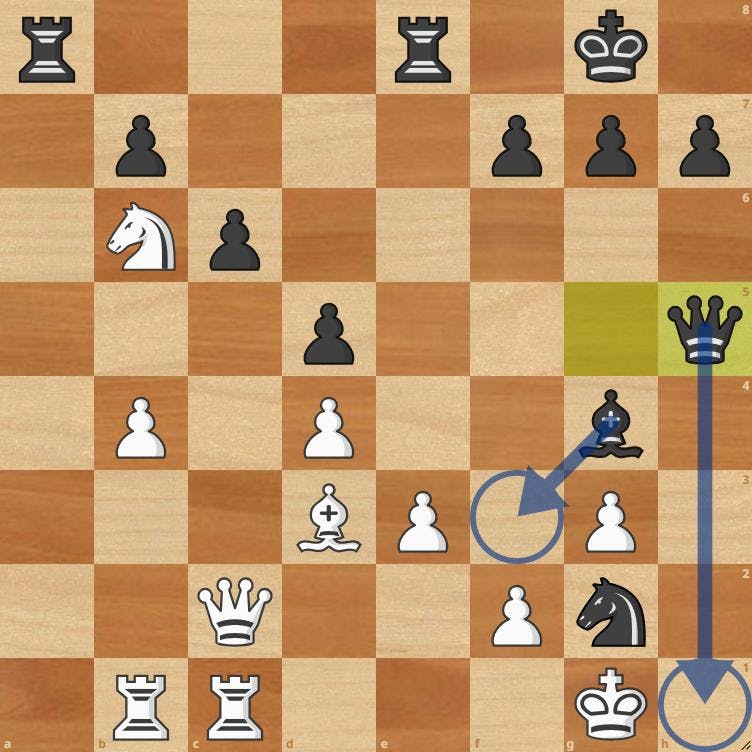
Now, let's hit play again and witness the next act after 14. b4 Be7:
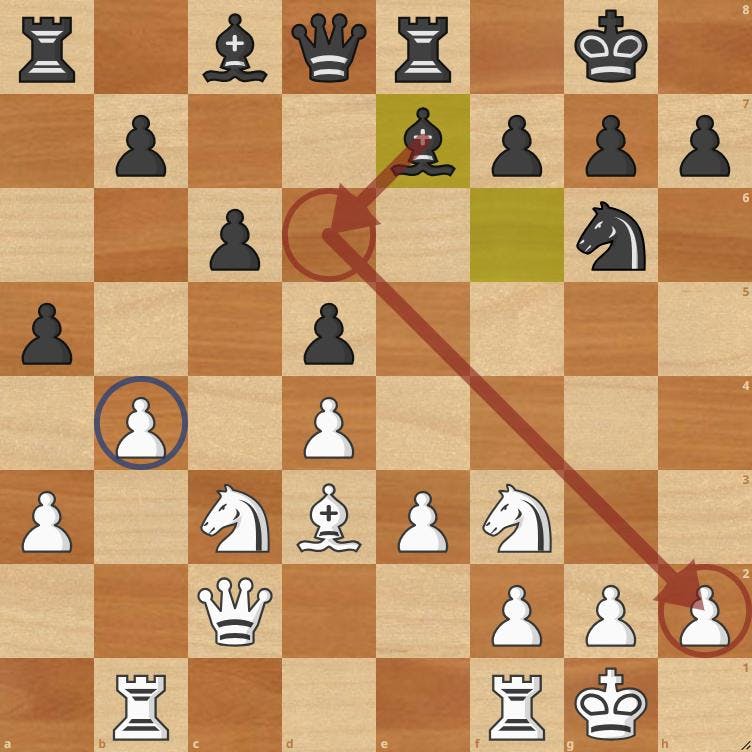
So, 14. b4 as planned by white, and black responds with 14... Be7! redeploying the bishop back on the enticing f8-a3 diagonal, to counter white's queenside play and to keep an eye on the key square b4 (highlighted in blue). But it also does the following:
Black wants to reroute his dark squared bishop to the d6 square (highlighted in red), where it's in the ideal location for attacking on white's kingside.
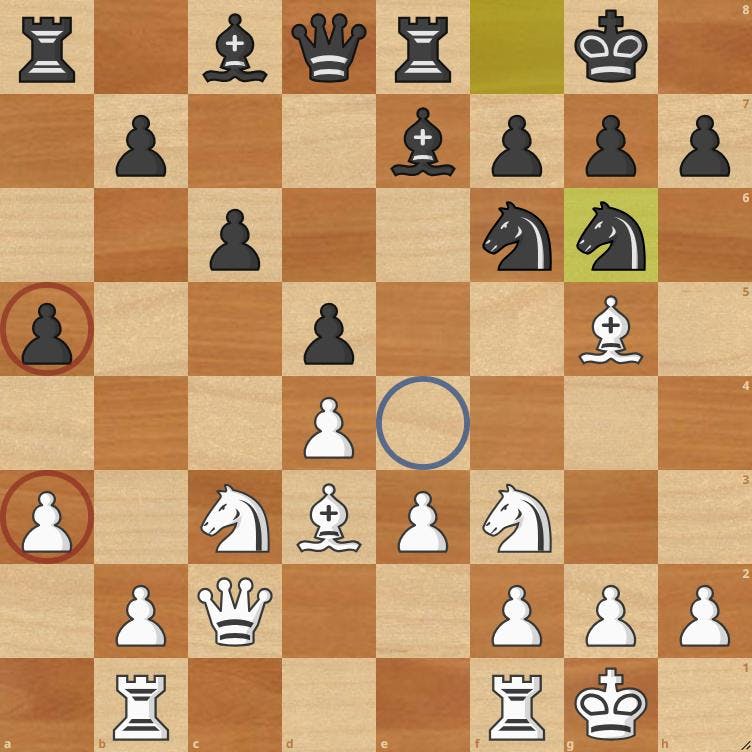
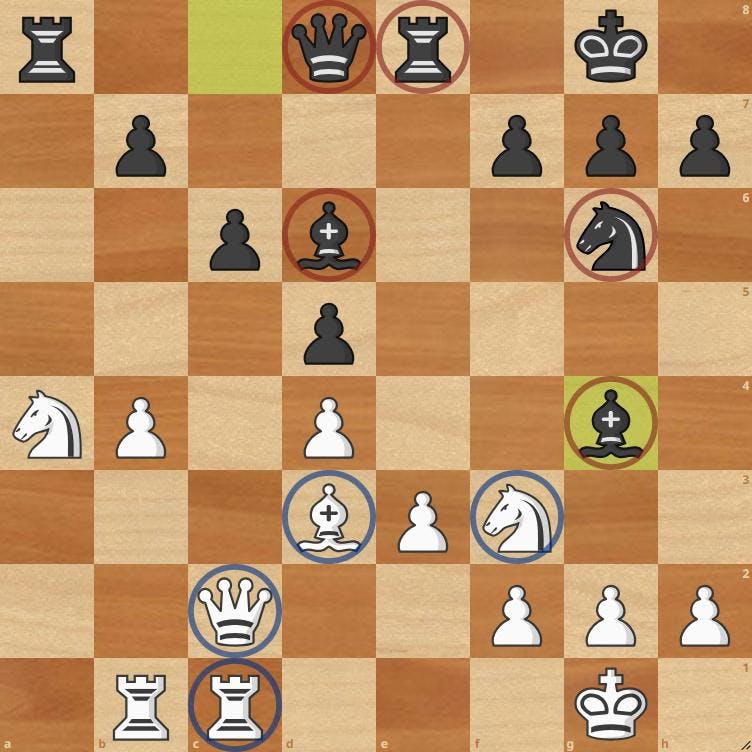
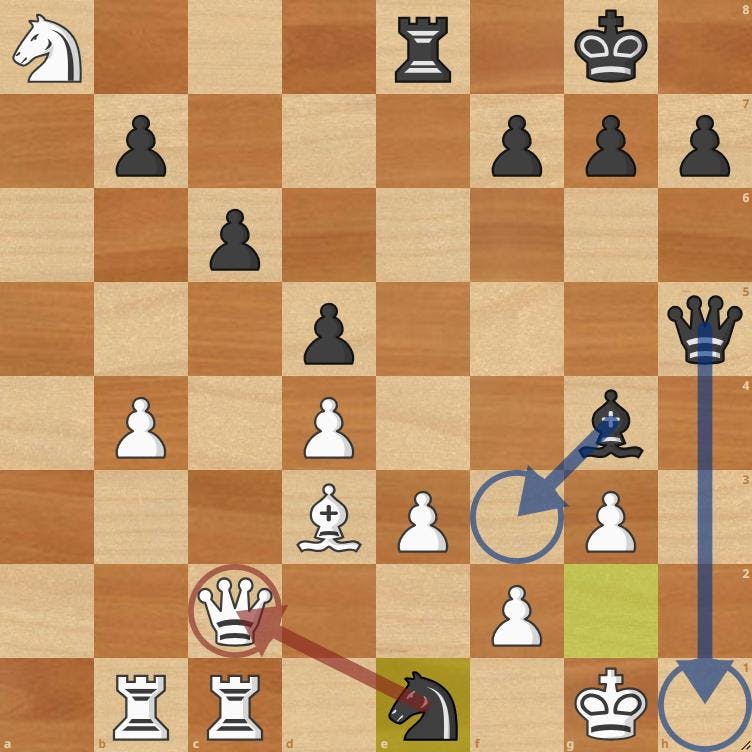
I'm going to skip over a couple of less relevant moves for the time being and show you the outcome of 15. Na4 axb4, 16. axb4 Bd6:
The above diagram is very busy with arrows, so let's decipher:
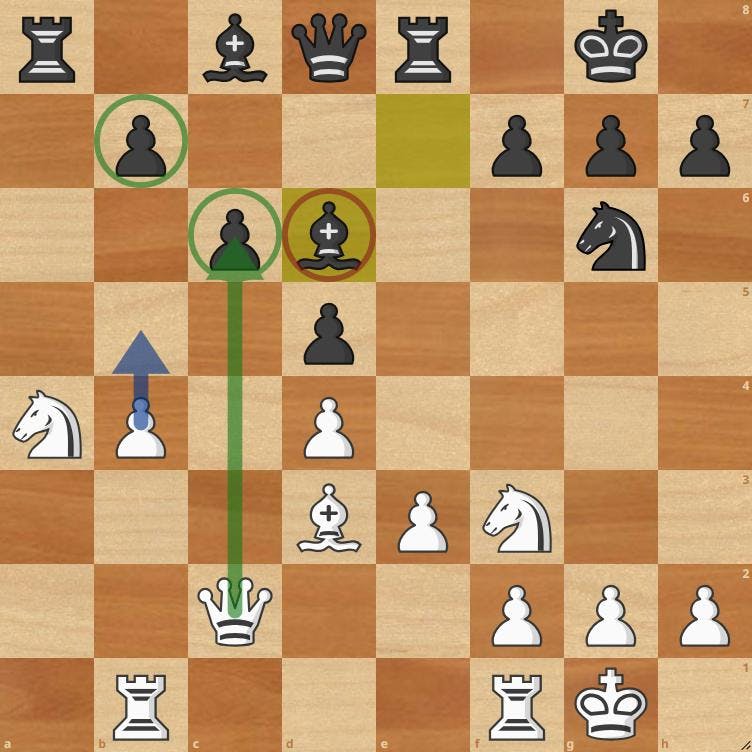
Let's continue with the show after 17. Rfc1 Bg4:
A quick breakdown on the following plans for either side:
Before we press on, I'd just like to say that, in a famous chess video on YouTube, Former World Champion Garry Kasparov, one of the greatest chess attacking players of all time, explains how simple he finds attacking to be. He leaves us with this very memorable statement in his video:
You need two more attacking pieces than your opponent has defending pieces. I swap one attacking piece for one defender, and I've still got all these other pieces I'm going to checkmate my opponent with.
If you're interested, it really is amazing to see a genius at work: https://www.youtube.com/watch?v=SMe-hvCwTRo&pp=ygURa2FzcGFyb3YgdGhvdWdodHM%3D
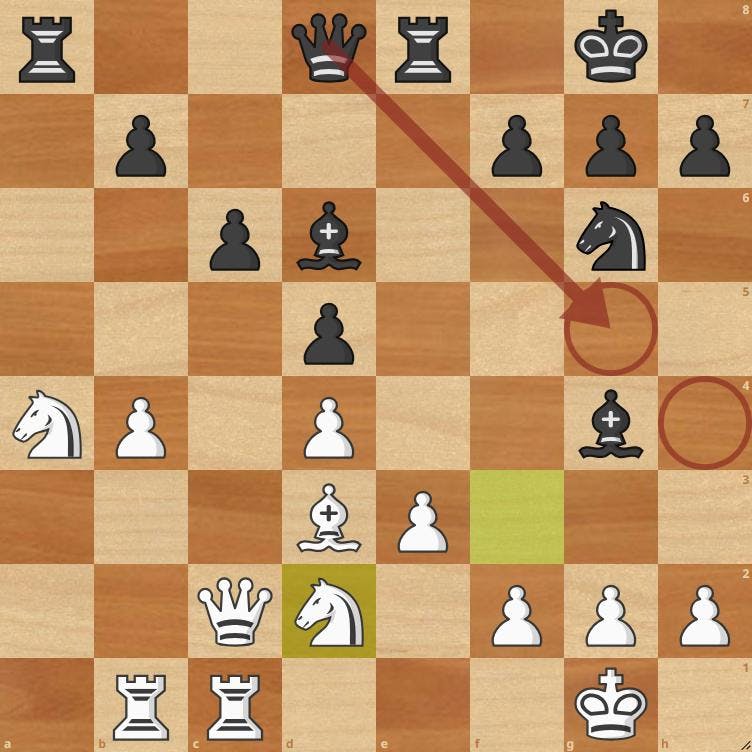
Let's make this finely illustrated point relevant to our game. Before I count the number of attacking and defending pieces myself, look at the preceding diagram and count how many potential attacking pieces black has in his arsenal, and how many potential defending pieces white has in his corner.
Okay, now you've done that, highlighted in blue are what I consider to be white's defenders, and highlighted in red is what I consider to be black's attackers, or pieces that my potentially become relevant to the game:
So a simple bit of maths shows 5 attackers from black's ends, subtract 4 white defenders, which leaves 1 piece remaining overall in black's favour. Not enough, is it? Kasparov says we need 2 extra attackers. But we need to remember, this number we calculated above may change within a matter of moves!
But for now, as we said above, white stopping black's threat of 18. Bxf3, and critically weakening his king, needs to be addressed ASAP!
So white decides that 18. Nd2, is the solution to this, and not giving black the option of 18. Bxf3:
But this move 18. Nd2, however loosens the g5 and h4 squares around white's kingside.
This gives the black queen an entry point into white's kingside, and soon we may need to reassess our ratio of attacking pieces to defending pieces.
So after 18. Nd2 from white, we then see the follow up 18. Qg5 from black, and 19. Nf1 from white, and this is shown on the diagram below:
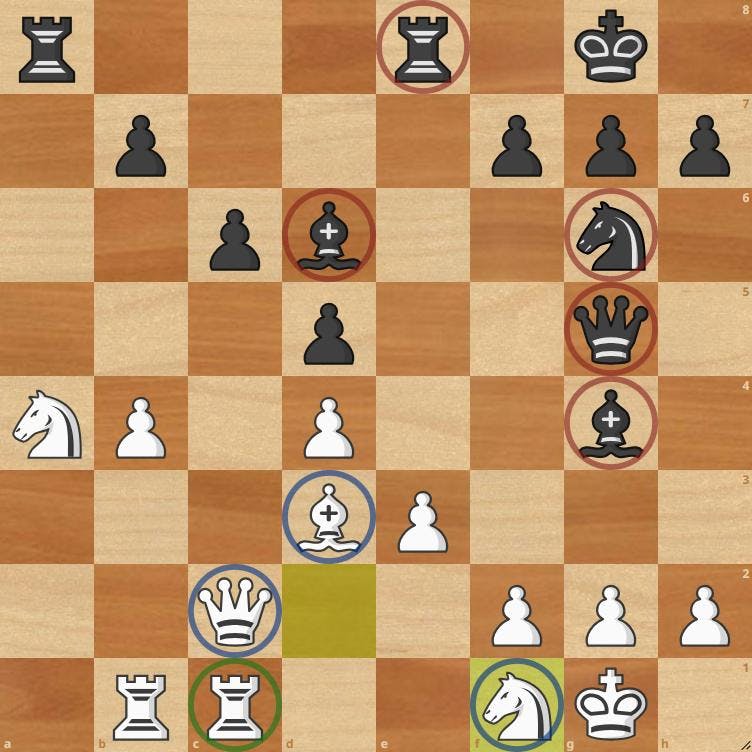
It's time to count those attackers and defenders again! I've highlighted the key defending and attacking pieces again, on the diagram above:
With the following move from black 19. Nh4, and white playing 20. Ng3, the ratio of attackers to defenders remains unchanged, and it's finally time to enact the second part of Kasparov's guidance:
Swap an attacking piece for a defending piece!
20. Bxg3!, and white is only a couple of moves away from resignation after black swaps the attacking bishop for the defending knight. 21. hg Nxg2!!
and black opens up white's weakened light squares. Note how close black's light squared bishop, is very close to the action.

White plays 22. Nb6, and counterattacks black's rook on a8. But that isn't a key attacker in black's position, is it? So black doesn't care if white captures this rook, because he's going to checkmate white straight after.
22. Qh5, black sacrificing his Ra8, and preparing Bf3 and subsequent Qh1# checkmate. White is going to get checkmated.
White attempts 23. Nxa8, and after black responds with 23... Ne1, threatening mate with the same pattern we discussed above (Bf3, and Qh1#), and an attack on the white queen. This double attack is lethal, and White Resigns 0-1.
Do I want you to memorise this exact 23 move miniature? No of course not. However, what I would much rather is to understand and learn the following points from this game:
Critical to remember:
13. Bxf6! Was not the start of white's problems. But it is a concrete move that determines the nature of the game to come.
Okay, I hope you've enjoyed this section of the blog. It's been a pleasure writing it so far, and I hope you've enjoyed it equally as much, and picked up some nuggets along the way.
Next time I'll be tackling the battle for the e4 square and Stonewall Dutch transformation. Until then, best of luck with your chess!